
Not everything that Microsoft Word 2010 can do is obvious from a quick look at the tools on the main ribbon toolbar. Some features are buried in the Options menu or in dialog boxes, and others take the form of keyboard shortcuts or simply aren't easy to see.
1. Create Lines for a Blank FormWould you like to be able to insert a cent symbol or type the accented é characters inrésumé, directly from the ribbon toolbar? How about adding your company's specialized terminology to the built-in Word dictionary? You can have these and other options for working faster and smarter in Word at your fingertips if you know where to find them and how to set them up.
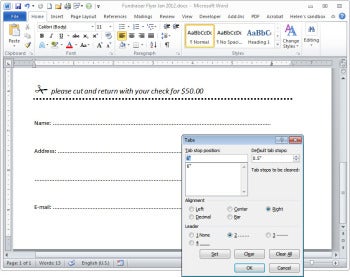
When a printed document--such as a form--needs typed or handwritten information added to it, you can use tabs to draw the blank lines. Start by typing the text (such as Name:) that prompts the form's reader to enter information on the blank line that you will draw; then press the spacebar, and select the Home tab on the ribbon toolbar.
Locate and click the Paragraph dialog launcher icon in the bottom right of the Paragraph group, and click the Tabs button at the foot of the Paragraph dialog box. Here you can create your own tabs--you'll need a single tab stop at the point where the dotted line should finish.
To set the margin at 6 inches in a letter-size document with 1-inch margins, for example, type 6"into the Tab Stop Position box, choose Right for the Tab Alignment, and choose 2 as the Leader to get a dotted line. The click Set and finally OK.
Back in the document, place the cursor where you want to draw the line; press the Tab key on your keyboard, and a dotted line will appear drawn from the blank space all the way to where you set the right tab. Press Enter twice, type the next prompt (such as Address:) and pressTab again. Every time you do this, a new dotted line will appear. When you're ready to return to normal editing, press Enter once and then press Ctrl-Shift-N to return to Normal paragraph style; and the default tabs will immediately reappear.
2. Label Items With Sequential Numbers
Word lets you create elements within documents that appear in numeric order, such as printed coupons or event tickets. You can automatically create sequentially numbered items by using field codes. First design the coupons or tickets; and, you can place multiple tickets on a page inside table cells, if you like.
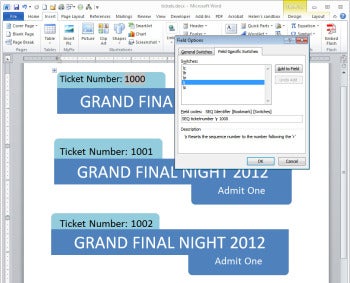
Click the location where the first ticket number should appear and selectInsert, Quick Parts, Field from the Categories list. Then selectNumbering, and from the list below choose SEQ. Next, click Optionsfollowed by the Field Specific Switchestab. After the letters SEQ in the Field Codes box, type a bookmark name that only you will see, such as ticketnumber, followed by a letter space, the marker \r, another letter space, and then the starting ticket number. Thus, to start at the number 1000, you would use this field code:
SEQ ticketnumber \r 1000
Click OK twice when you're done. Starting at the location where the next number should appear, repeat the process, this time using this field code:
SEQ ticketnumber \n
Click OK twice. The next-larger number (1001) should appear in the designated place. Copy this field code and add it everywhere you need an incrementally larger number. You can perform this operation as many times as you need to. If the numbering doesn't automatically increase incrementally, force it to do so by pressing Ctrl-A to select the document and then pressing F9to update the fields.
At any time, you can change the start number by clicking the first field code you added and then pressing Shift-F9 to view the field code. Replace the number 1000 with your new starting number, and then press Shift-F9 again to hide the field code. To update all of the codes to reflect your new starting number, press Ctrl-A followed by F9.
3. Reverse the Page Print Order
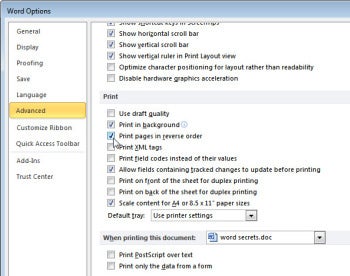
If the pages in your document are printed the wrong way around, you can reverse the print order by selectingFile, Options, Advanced, and then scrolling to find the Print group of options (these are different from and in addition to the Printing Options in the Display settings). Locate and change the setting of the Print Pages in Reverse Order checkbox; if it was enabled, disable it, or vice versa. Finish by clicking OK. In the future, documents will print in reverse order, saving you the trouble of having to reorder them. This setting will remain in place the next time you open Word, and it will apply to all documents.
4. Save Images as Building Blocks
When you need to add a repeating image (such as a logo) to your documents, you can save it as a building block for easy insertion.
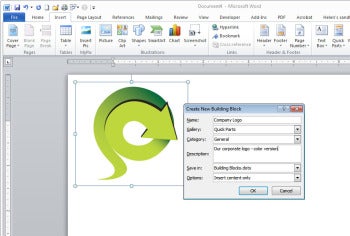
First, insert your image into a document and format it to look the way you want it to. Click the image to select it, choose Insert, Quick Parts, and then choose Save Selection to Quick Part Gallery. Type a name for the image, and select a gallery to add it to (Quick Parts is a good choice); then change the Category setting toGeneral or add a new category if you wish. Type a description of the image, and select it to save it in Building Blocks.dotx, a file that Word automatically creates during this process. End by clicking OK.
The image will be stored permanently in your building blocks collection, and you can add it to any document by choosing Insert, Quick Parts and clicking to select it from among the items displayed there.

No comments:
Post a Comment